Things to check out.

Showing posts with label paper roses. Show all posts

Friday, October 9, 2015

New Class

Okay, I'm ready to do some crafting, join me in my Kraft Kottage!   I'll be offering some new classes and open crafting.   The first class will be to make a gift bag, and it will be held on two different days.  You can do one or both.
Splitcoaststampers calls it a box in a bag, others call it a bag in a box.
It's pretty cute and sort of looks like a purse.
 
Tuesday October 27, 2015
or
Thursday October 29, 2015
2pm
Space is limited please RSVP

I'll also have my Kraft Kottage open for crafting on Tuesdays and Thursdays at 1pm.
Come on and join me!

Wednesday, February 12, 2014

DIY Kit Challenge

Hello!
I went to a get together with some of my CTMH Besties last night. Okay, it was a business meeting but we also had some fun. 
The challenge was to come up with a project and bring it in the form of a kit for each of the other demonstrators.  There were some great ideas! The one I created was a tiny milk carton.
I was happy that everyone liked it.  It was created from the "2-4-6-8" box that's been around for many years.  You will all learn that I am obsessed with boxes.  Following is a diagram of how to make one, sort of, I learned that I need to be more explicit in my instructions.  Since this was a learning experience, then it was a success.
The dark lines are score lines and I noted where they should be cut, and I should have noted that the 'skinny' section on the right end is where you would put the adhesive.  I would recommend the red sticky tape for boxes.
The products I used were from Close to My Heart.  White Daisy cardstock (#1385), stamp set used was My Life, included in the Artbooking Cricut Collection (#Z1906), stamped with Cranberry ink (#Z2116), the flower and hearts were cut using the Art Philosophy Cricut Cartridge (#Z1686) from Cranberry cardstock (#1272), and the 'leaves' Topiary cardstock (#X5635).  Also used a binder clip and some bling.

Have a great day, go get creative!

Wednesday, January 29, 2014

Happy New Year!

Hello everyone!  I've been away far too long!  I hope all the holidays were great for you, I know mine were great.  I was spoiled by Santa and I got to spend lots of time with my family.  That's all I need.

I have rescheduled the Cricut Class.  Get more from your Cricut!  I'll help you out on Wednesday, February 12 @ 6:30 or Saturday February 15 @ 10AM. Sign up early there's only room for 4 in each class.  Bring your own Cricut and accessories.

I've had the bug.  The crafting bug, so I covered a box.  The My Creations Card Box (Z1647) and I used a retired paper pack.  But I did have fun creating.
Here's the box...

  I'll hold a class on March 6th and but sign up by February 24.

I'm planning more classes.  Please stay tuned and I'll figure out how to do all this.  In the meantime get out there and create, and if you need any help... let me show you how!

Wednesday, October 30, 2013

Baby Shower

Last weekend there was a baby shower for my son and his wife.  They are expecting my fourth grandbaby in December.  Yay!!
The girls who threw the shower asked me to help with decorations, another "Yay!"  I created a diaper cake, a banner, centerpieces and party favors.  I had so much fun!  The colors they chose were green, blue and orange, using an Irish theme, because the couple loves Ireland!
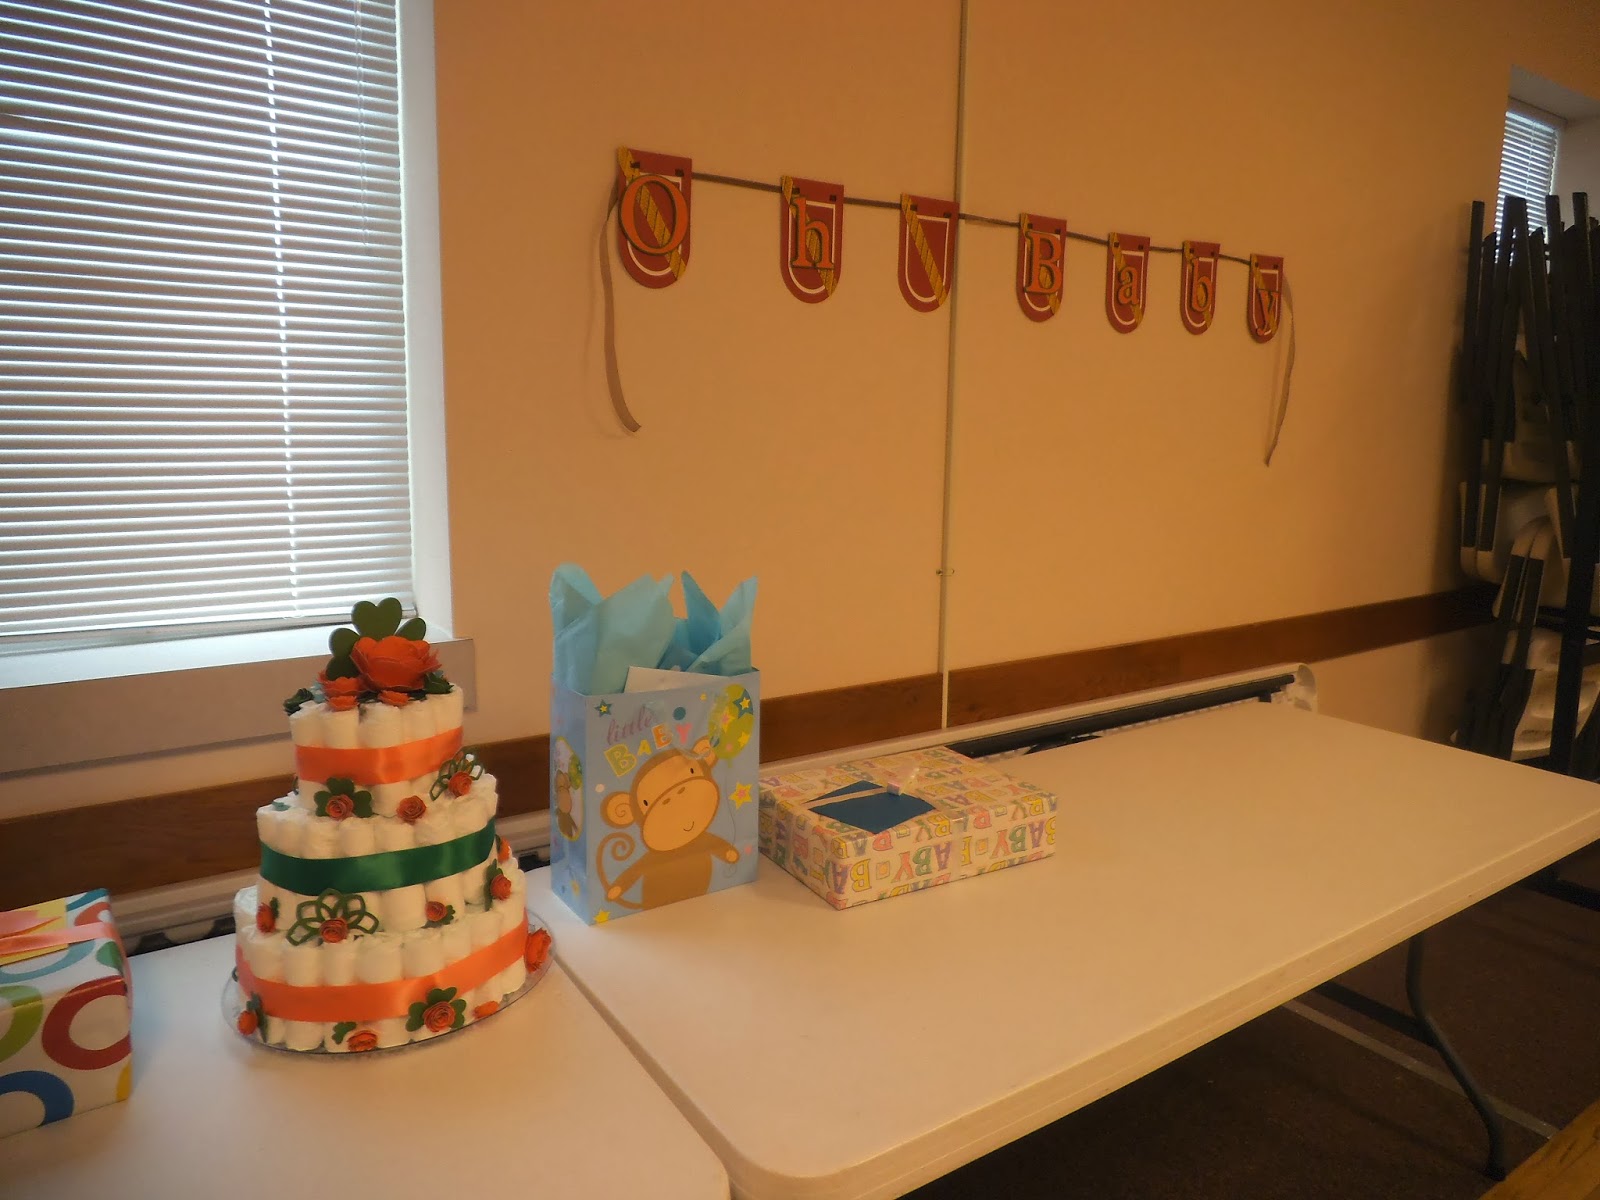
The photo above shows how the cake and banner were displayed. It wasn't long before the table filled with gifts!
Above is a close up of the banner.  I used Art Philosophy Cricut cartridge, Banner3 on page 39.  Cut at 8" using Ruby Cardstock, 6" using Colonial White cardstock and 5.5", again, using Ruby cardstock, for the layering. I'm not sure of the yellow paper and stamp set used.  The lettering was cut using the Plantin Schoolbook cartridge, using Topiary and Sunset cardstock.  I used this particular design because I tried to mimic their family coat of arms.

 Above is a close up of the diaper cake.  96 diapers rolled and banded around a bottle of Champagne, Mommy can celebrate after baby is born!  The cardstock used was Topiary and Sunset, they were just a wonderful match to what I wanted to create.  The shamrocks were created using Heart1 on page 27 of Art Philosophy cartridge, cut in various sizes.  The roses were cut using the Artiste cartridge, Accent 2 page 54, cut many different sizes.  The "celtic knot" was cut from Art Philosophy, the Decorative layer on page 51. 

This is the center piece
and this is a top view.  I used the same shapes and colors that were used on the diaper cake.
 This silly thing was the "favor."  The popcorn box is in Artiste page 67, cut at 2", from Black cardstock.  I found the "cloud" shape on page 66 cut at 1" from Sky cardstock.  I used the "A Rainbow" stamp set to emboss the cloud with Silver Pearl embossing powder and the Rainbow onto Colonial White cardstock, colored with markers and cut out. Glued together then filled with gold wrapped candies.
I got lots of compliments and I am so proud of what I made.